How to connect your local database with Rocketadmin through a Pinggy TCP tunnel
Pinggy is a tunneling service that enables the secure exposure of your local server or database to the internet. This functionality is particularly beneficial for testing purposes and for sharing your local database with others.
Although this manual primarily focuses on connecting a local MySQL database with the Rocketadmin app as an example, it can also be utilized to establish connections with other types of databases supported by Rocketadmin.
The instructions are general and do not contain any detailed explanations on specific Pinggy features. To learn the fundamentals, find best practices and experience the full Pinggy potential, please visit https://pinggy.io/docs/.
Prerequisites
Prepare a database
Using a database tool of your choice, create a database or configure an existing one, and fill your tables with the necessary data.
For example,
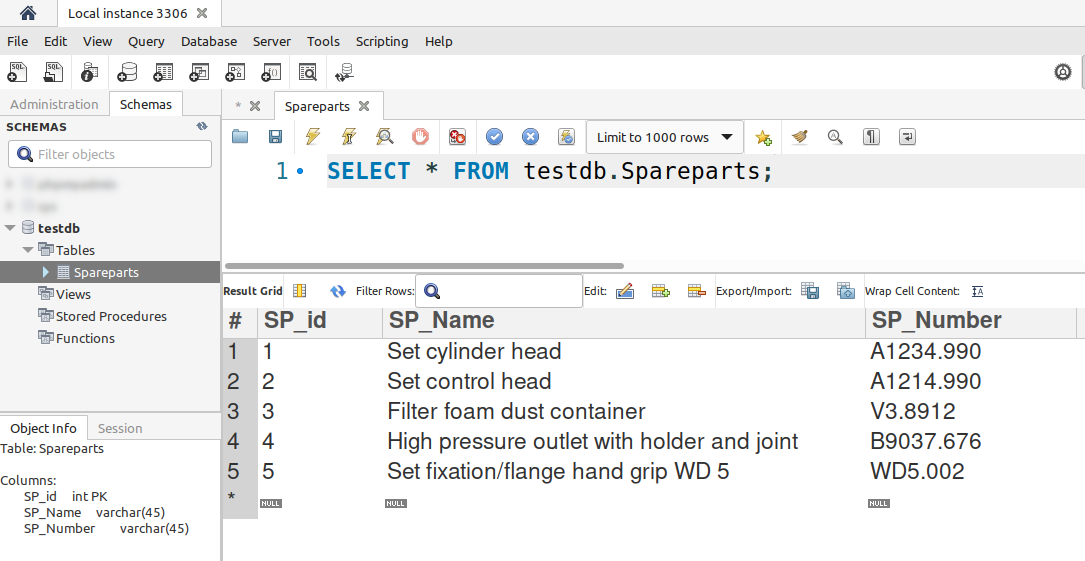
Ensure that the database server is operational.
Enable your SSH client
Ensure that an SSH client is installed on your system. This manual will utilize the OpenSSH client for demonstration purposes.
Create Pinggy account
Create a user account and sign in to the Pinggy Dashboard.
Create a TCP tunnel
-
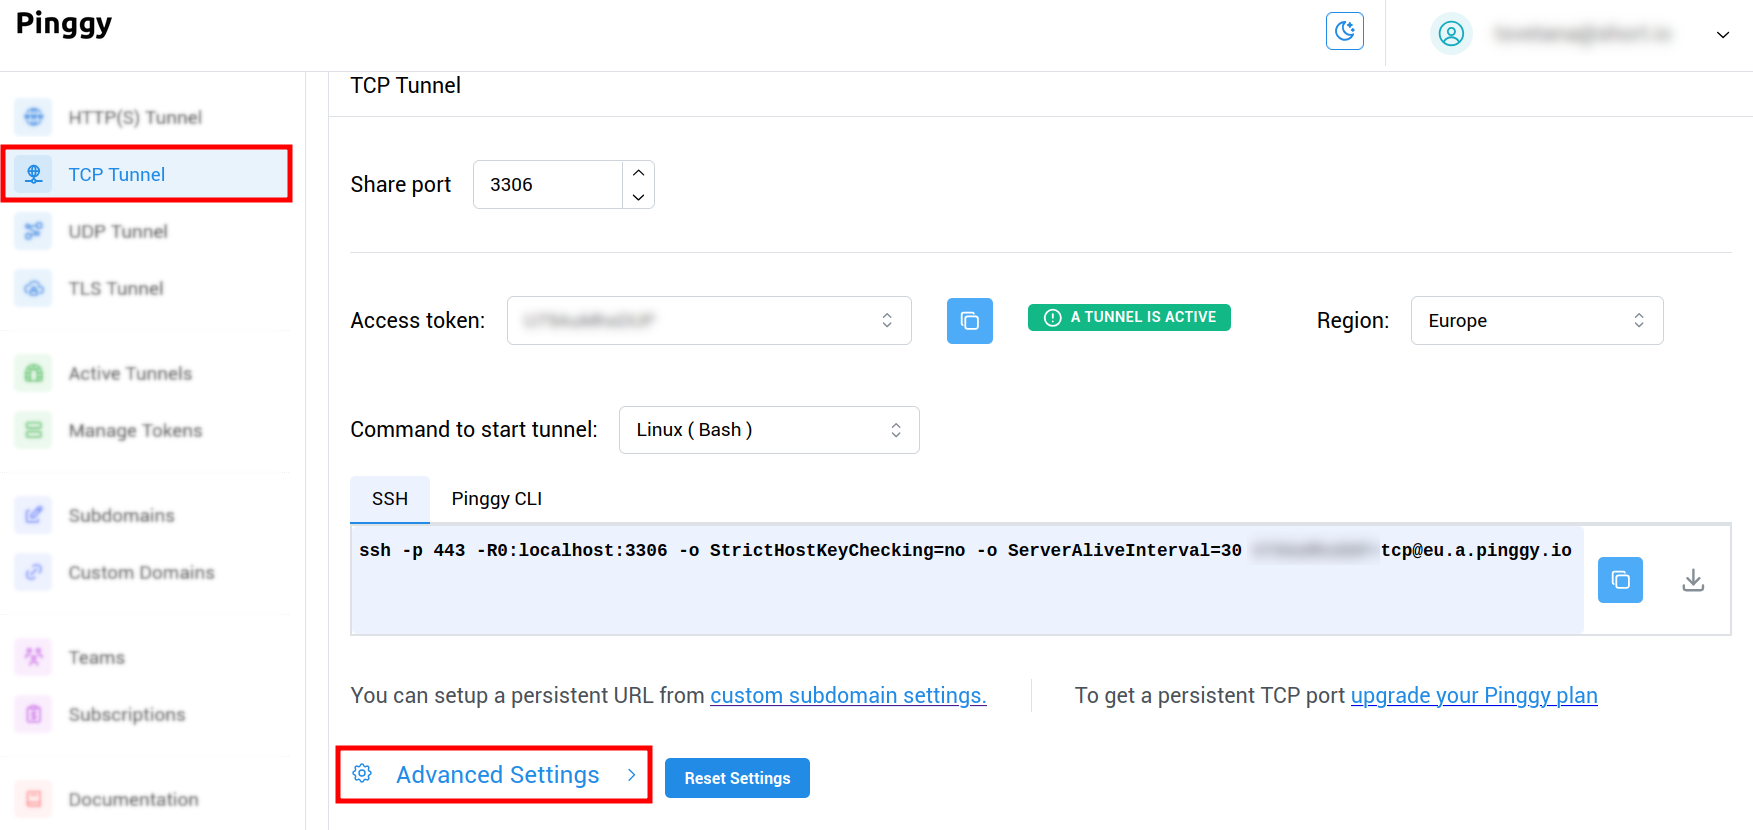
From the Pinggy Dashboard navigate to the TCP tunnel option:
-
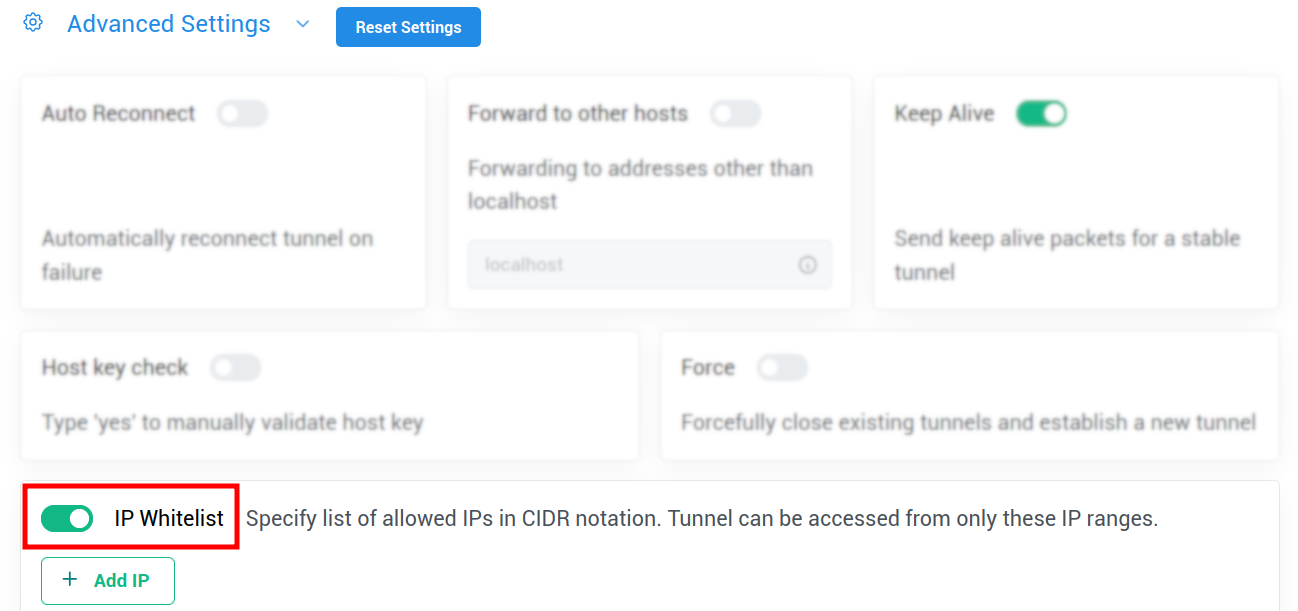
Expand the Advanced settings:
-
Enable the option IP Whitelist and click on Add IP.
-
Enter the Rocketadmin IP address - 18.221.81.73/32 as trusted source, granting us access to your database:

-
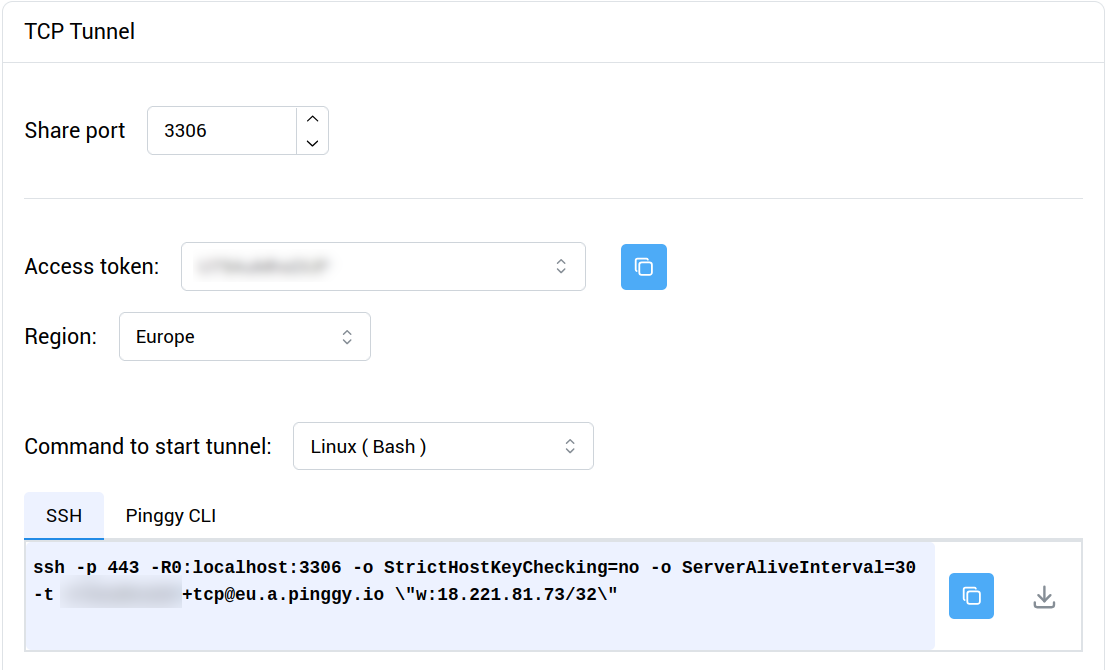
Scroll up to review the general tunnel options:
- enter a Share port depending on your database type
- select a Region
- select your operating system type
-
Click on
to copy the command:

-
Open your terminal app or command line tool, paste and execute the command:

As a result, Pinggy creates a personalized tunnel link for you:

Create Rocketadmin connection
-
Sign in to your Rocketadmin account.
-
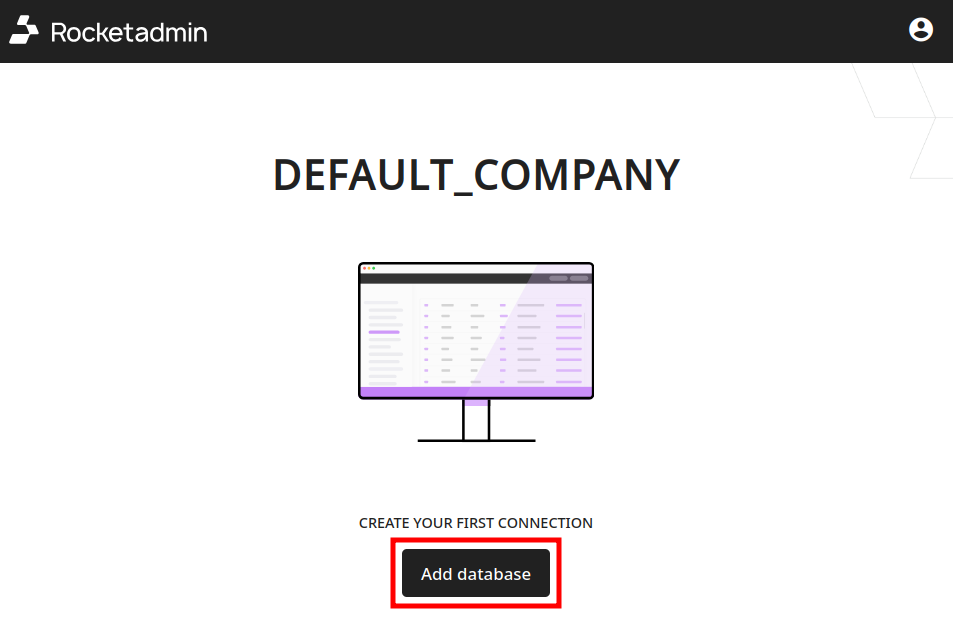
In the Dashboard click on Add database:
-
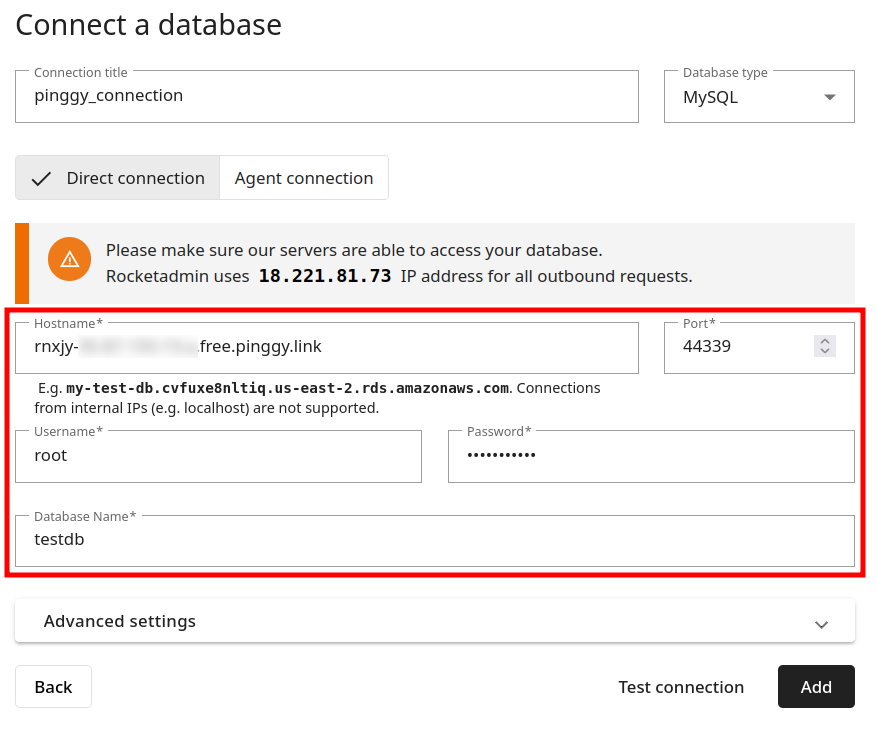
In the Connect a database screen:
-
enter a name for the connection
-
select MySQL as database type

-
-
Enter the following information in the connection's details:
-
Hostname and Port - copy and paste the pinggy values from the command line tool in the respective Rocketadmin fields:


-
Username, Password, Database name - enter your database credentials and details:
-
-
Click on Test connection.
-
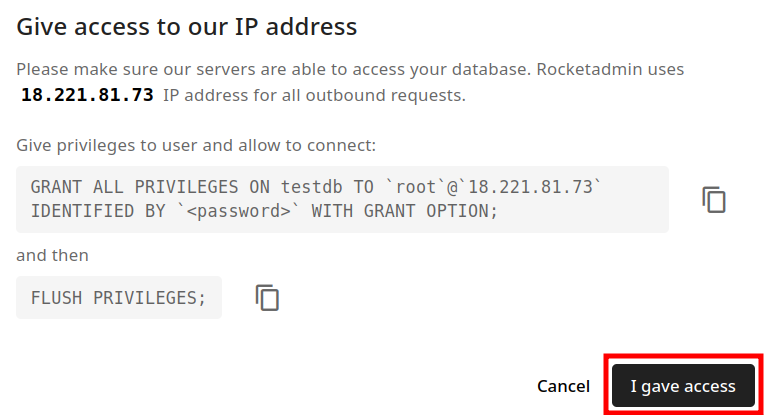
Once the connection is successful, click on Add. The following message appears:
-
Click on I gave access since the Rocketadmin IP address - 18.221.81.73/32 is already added as trusted source.
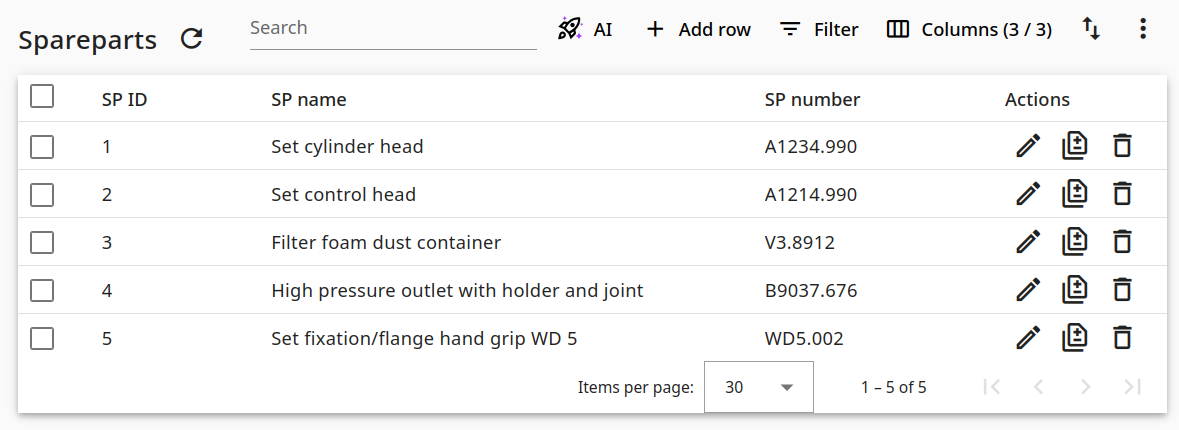
Your database and table appear in the Dashboard:
